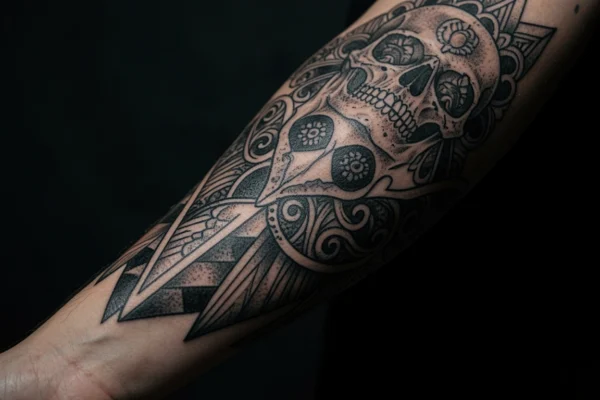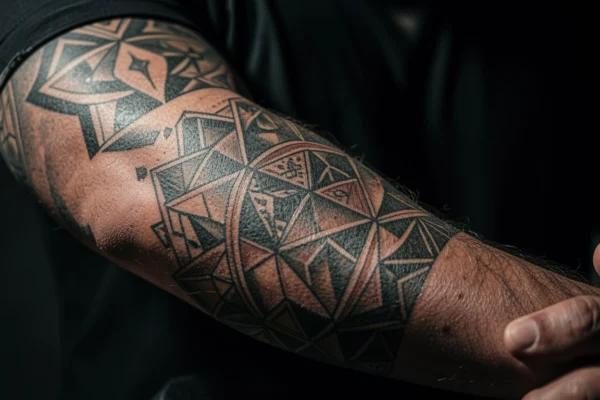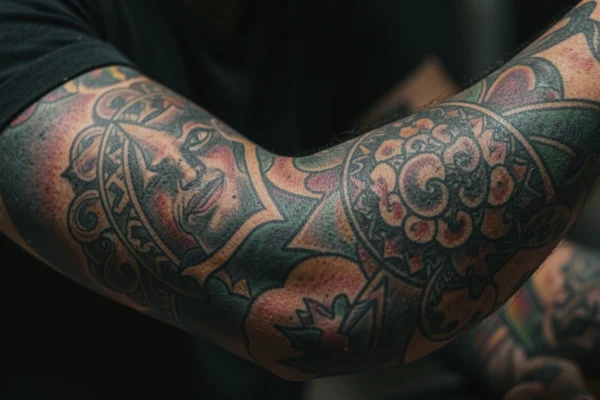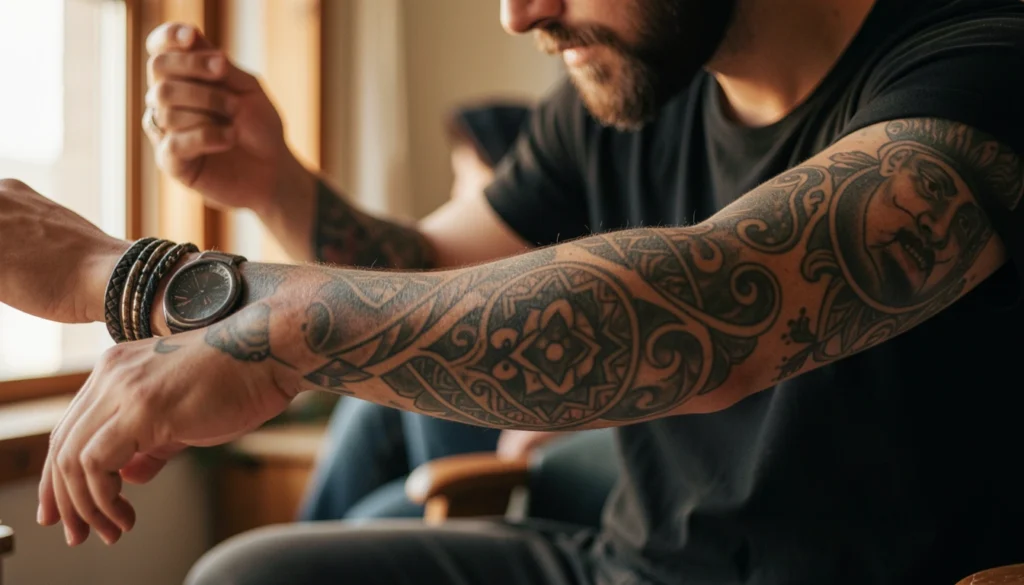
Strong outlines and bold color blocking are central to successful traditional full sleeve tattoos for guys because those features keep motifs readable when the arm curves and moves. Identifying whether you want a high contrast black and gray sleeve or a saturated color approach matters early, since line weight and shading choices change how a sleeve ages and how an artist plans the layout.
Think about the amount of negative space you want between motifs and how elements will flow around the elbow and shoulder, because scale and spacing affect visual cohesion more than individual image detail. Choosing a theme that can repeat or vary across panels helps an artist design transitions that look intentional.
The pins below highlight a range of traditional sleeve ideas and layout choices; each entry explains what makes that idea useful and what to ask your artist during a consultation. Use the notes to narrow options, prepare a few reference images, and identify the technical questions to bring to your appointment.
41 traditional full sleeve tattoos for guys to consider
Strong single arm portrait
The portrait oriented toward the outside of the arm shows how a single dominant figure anchors a traditional sleeve. When a sleeve is built around one main element, consider how supporting icons or florals wrap down the arm so the portrait remains the focal point from most angles. Ask your artist how much scale change they need to keep facial features clear around curves and joints.
Layered arm coverage
Dense coverage with overlapping motifs demonstrates a common full sleeve approach that reads as a single visual block. That kind of layering requires strong outlines and consistent shading so small motifs do not vanish over time. If you want this look, discuss composition and a palette limit to avoid visual clutter and ensure each element remains legible.
Seated arm showcase
An arm photographed relaxed in a chair lets you see how motifs fall when the elbow is bent, an important consideration for sleeves that cross the joint. Pay attention to how designs compress when you move; ask your artist to draft the sleeve with the arm in several positions. That practice helps avoid awkward breaks where a motif meets the elbow or inner arm.
Matching partner pieces
Two people with similar motifs highlight how repeating icons can be adapted across different canvas sizes and shapes. Translating a shared design into a full sleeve means planning scale and negative space for each person individually. If you are considering matching or coordinated work, bring both references to a single artist so they can adapt composition for each arm.
Arm cluster composition
Photographs showing multiple smaller images grouped on the arm suggest a collage style that still reads as traditional when outlines are strong. Collage sleeves work well when motifs share a consistent style and color family so transitions feel deliberate. Discuss a unifying element with your artist, such as a recurring color or border motif, to hold the sleeve together.
Age and healed work
An older arm with tattoo work shows how traditional sleeves age and how line and color choices hold up over decades. Consider how bolder lines and simpler color blocks often remain readable longer than extremely fine detail. Ask your artist about touch up prospects and how they plan lines to allow for later maintenance.
Heavily inked arms
When a sleeve flows into chest or hand work, plan transitions so the arm does not feel disconnected from adjacent tattoos. A sleeve that meets chest pieces needs balanced negative space and connector motifs to avoid a crowded look near the collarbone. Talk with an artist who can draw full upper body compositions or who will coordinate with a second artist.
Warm wall portrait shot
A standing portrait against a colored wall highlights contrast choices that make colors pop on camera, useful if you intend to photograph your sleeve. Pay attention to saturation levels and skin tone because some pigments read differently on various complexions. If photography is important, ask your artist which colors will hold up in both daylight and warm indoor light.
Leg motif reference
Leg tattoos in a similar traditional style show how motifs can be adapted across body parts while keeping a shared aesthetic. If you plan chest or leg work to complement a sleeve, note differences in skin texture and curvature when sizing motifs. Discuss whether repeating icons or distinct but related motifs better suit your overall plan.
Classic full sleeve example
A clear example of a full sleeve provides a good blueprint for how to balance large and small imagery. Traditional sleeves often use anchor pieces at the upper arm and forearm with filler elements at the elbow and inner arm. Use a reference like this to point out preferred motif placement and to ask how an artist would adapt it to your arm size.
Symmetric arm motifs
Tattoos that echo motifs across the outer and inner arm show a symmetry approach that reads as intentional. Symmetry can make a sleeve feel cohesive, but it can also limit spontaneity. If you want repetition, decide whether perfect mirroring or subtle variation better matches your taste and bring both options to the consultation.
Stone wall portrait
Background texture in a photo highlights how an arm reads against different tones and patterns, useful when finalizing color contrast. Observe how colors and line weight appear against neutral backdrops before committing to highly saturated pigment. Ask your artist to show healed examples in similar lighting to set realistic expectations.
Asian themed elements
A black and white arm with dragons and pagoda motifs suggests traditional Asian influences adapted into sleeve work. When borrowing motifs from cultural art, consider respectful placement and appropriate styling to avoid appropriation. If cultural symbolism matters to you, research the imagery and discuss meaning with your artist so the sleeve reflects intentional choices.
Minimal visible frame
A single visible motif in a photo can show how negative space frames the design and increases impact. For sleeves, deliberate gaps between images can act as resting points and prevent the arm from looking visually overloaded. Decide whether you prefer continuous coverage or distinct panels separated by skin space and bring that preference up early.
Shoulder and arm blend
Shoulder to arm flow is vital when a sleeve extends into shoulder panels, because rounded surfaces require careful contouring of motifs. A design that wraps neatly over the deltoid should avoid abrupt edges at the top of the sleeve. Ask to see sketches of how the artist will curve motifs to match your shoulder shape.
High contrast forearm focus
Photographs that emphasize the forearm can show how motifs read at eye level during everyday interactions such as handshakes. Strong foreground elements on the forearm can anchor a sleeve visually and guide the eye up to supporting shoulder images. If you work in a context where forearm visibility matters, make sure your preferred motifs are placed where they will be seen.
Subtle outer arm piece
A single outer arm motif shows how a focused emblem can be integrated into a larger sleeve plan later. Starting with a key piece gives an artist a reference style and color scheme to build the rest of the sleeve around over multiple sessions. Discuss long term planning and spacing so future motifs wrap naturally around the original work.
Picture wall background
Photographing the arm against a busy background helps evaluate how colors and lines perform in varied settings and can highlight which motifs retain clarity. If you plan to show the sleeve in photos or social media, ask the artist which combinations photograph best. They may recommend adjustments to color saturation for better visual impact in images.
Workplace friendly placement
An arm shown with a laptop suggests a balance between visible artwork and professional contexts and highlights the forearm as a place people see often. If you need to manage visibility for work, consider foreground motifs you are comfortable showing and plan larger pieces for the upper arm or shoulder. Talk to your artist about sleeves that can be covered by shirts when needed.
Casual street portrait
Street style portraits show how a sleeve integrates with clothing choices and everyday posture. Consider how sleeve motifs look with both short sleeves and tank tops when choosing a palette. If you prefer a subtle presence, favor black and gray or limited color accents to reduce high contrast.
Paired arm photos
Two arms together illustrate how consistent style across multiple pieces creates visual harmony, even with different imagery. For a single arm sleeve, maintain the same line quality and shading approach throughout to avoid a patchwork look. If you plan additional pieces later, record color codes and pigment names with your artist for continuity.
Dragon statement motif
A dragon over the upper arm is a classic statement piece that can anchor a traditional sleeve with a bold central image. Large mythic creatures work well with surrounding clouds, waves, or florals to smooth transitions. Ask your artist about line thickness over the widest parts of the arm to ensure the dragon retains form as it moves.
Storefront candid shot
A window light candid can reveal subtleties in color tones and how pigments reflect light, which matters when picking a palette. Bring photos of your preferred natural lighting to the consultation because the same pigment can appear quite different indoors. Your artist can advise which colors age better under your typical lighting conditions.
Object holder detail
Shots where the subject holds objects show how a sleeve looks during common gestures, useful for checking motif distortion across joints. Test imagined everyday actions and ask the artist to place key imagery where it will not warp when you bend your arm. They may adjust scale or orientation to preserve clarity in typical positions.
Tank top display
A sleeve shown in a tank top highlights forearm and shoulder interplay and helps you evaluate how much of the upper arm you want covered. If you plan to wear sleeveless shirts often, place favorite elements where they will be visible. Consider how fills and negative space affect the overall silhouette when the arm is exposed.
Dragon wrap and shoulder
Large dragon work flowing onto the shoulder demonstrates the continuity a sleeve can achieve across muscle groups. For pieces that wrap onto the shoulder blade or chest, request stencil placement checks in multiple poses. That helps ensure motifs do not end abruptly when you change arm position.
Neutral background shot
A plain door backdrop isolates the sleeve for honest comparison of contrast and line work, which is useful when selecting a preferred style. Use such images to compare artists and to spot differences in line saturation and shading technique. Save examples that show the finish quality you want to emulate.
Simple forearm focus
A focused forearm image is a reminder that a sleeve can be staged around smaller concentrated areas or expanded later into a full wrap. Starting with a forearm cluster allows gradual commitment while still achieving a coherent look. Clarify how the artist plans to connect future pieces to the original work.
Cross centerpiece layout
A central cross motif can act as a thematic anchor for other traditional icons and floral elements. When a sleeve features a strong center, use supporting motifs to create radial balance around it. Discuss which motifs will sit closest to the center and how filler work will soften transitions.
Contrasting arm pairs
Two different arms with unique motifs show how varied themes can coexist within a single style family without matching motifs exactly. If your sleeve will be paired with other body tattoos, coordinate palettes so the overall look remains cohesive. Share both arm references with the artist to confirm a shared visual language.
Floral shoulder piece
A flower and shoulder composition demonstrates how softer motifs can balance bold central icons in a traditional sleeve. Using florals as filler slows visual pacing and helps integrate heavier elements. If you like florals, ask your artist about scale choices that maintain petal detail on rounded areas.
Candid hand placement
A hand holding the opposite arm highlights gestures that reveal or conceal parts of the sleeve, which matters for motif placement near the wrist and inner elbow. Test common gestures in front of a mirror to see which areas are seen most. Share those observations with your artist so they can prioritize favorite images in visible zones.
Chest and sleeve integration
Tattoos that move from chest into the sleeve illustrate planning for larger compositions and how motifs should scale across planes. If you plan extensive chest work later, begin your sleeve with connector elements that will not clash with future imagery. Discuss long term placement and how chest pieces will meet the upper arm.
Black and white foreground
A black and white arm photo highlights how contrast and negative space can carry a sleeve without relying on color. Black and gray traditional work ages gracefully when lines are bold and shading is consistent. If you favor this look, confirm the artist uses a variety of needle groupings to create rich tonal depth.
Full arm coverage example
Images showing full arm coverage give a clear sense of density and the balance between large motifs and small fillers. Use these references to decide whether you prefer a patchwork of icons or a continuous narrative that reads from shoulder to wrist. Ask about session planning and how long the artist expects each stage to take.
Storefront reflection shot
Reflections and glass backgrounds emphasize color depth and how glossy pigments appear under varied light. When choosing pigments, see healed photographs under similar conditions to match expectations. An artist can show you healed examples that illustrate how initial brightness settles over time.
Dense forearm panels
Close packed forearm panels demonstrate how rhythm and repetition of small motifs can be powerful when executed with clear outlines. If you prefer a patterned look down the arm, maintain a limited palette and repeat certain shapes to create flow. Ask your artist for a layout map showing how pieces will align when the arm is bent.
Upper arm study
Upper arm studies help you visualize how primary motifs will sit on the largest, most visible part of the sleeve. Large images placed here serve as landmarks when adding filler work toward the wrist. Ensure your artist drafts the upper arm placement first so supporting motifs can be sized accordingly.
Casual tank top example
A relaxed tank top shot shows how a sleeve looks in everyday wear and how visual weight is distributed between forearm and shoulder. Consider which images you want visible most often and communicate that with your artist. If you have a dominant motif preference, place it where casual clothing will show it.
Complementary arm pieces
Multiple arm motifs together show how to harmonize different images using consistent line work and color shading. When combining differing icons, tie them together with repeating background elements or similar color accents. Bring several images to the artist so they can propose connective filler ideas.
Subtle wrist to elbow flow
Photo examples of flow from wrist to elbow reveal how corner motifs guide the eye along the sleeve and create movement. A good sleeve plan considers how to lead the gaze around the arm rather than stopping abruptly. Ask the artist for a finished mock up to preview the path the eye will take when viewing your sleeve.
Preparing for a traditional sleeve tattoo
Planning a traditional full sleeve tattoo for a guy requires decisions about theme, palette, and the practical order of sessions. Start by deciding whether you want a coherent theme such as nautical motifs, mythic creatures, or religious icons, because a single theme helps a sleeve read as one piece rather than a collection. Once you have a theme, limit the palette to two to four main colors so the sleeve feels unified and easier to maintain.
Next, prioritize which areas should host your strongest images. Upper arm pieces hold the most visual weight and are easiest to cover later if plans change, while forearm motifs are seen more often and should reflect images you are comfortable showing daily. Discuss session planning with your artist so they can sequence work from anchor pieces to filler work, reducing the risk of awkward gaps. Finally, ask to see healed photos of similar work to judge how lines and color settle over time and agree on a plan for touch ups.
Frequently Asked Questions
Choose a theme by considering the images you identify with and how they will work together on a curved surface. A cohesive theme such as nautical, mythic beasts, or classic Americana simplifies palette and layout decisions and helps your artist design smooth transitions. Bring several reference images and highlight which motifs are priorities so the artist can scale and place anchors first and plan filler elements to connect them.
Color sleeves rely on saturated pigments and contrast to make individual motifs pop while black and gray relies on line work and tonal variation to create depth. Color allows a broader visual language but needs careful palette control to avoid muddy areas; black and gray can read as more restrained and may age in a predictable way when outlines are bold. Discuss with your artist how pigments behave on your skin tone, request healed photos for comparison, and decide which approach aligns with your long term maintenance preferences.
Yes, a sleeve can be designed to cover or integrate older work, but the feasibility depends on the size, color, and saturation of the existing tattoos. Dark, dense pieces may require larger new motifs or creative filler to fully mask them; sometimes integrating older imagery into a revised theme produces a better visual result. Bring clear photos of the existing tattoos to your consultation and ask the artist for a mock up showing whether covering or blending will yield the outcome you want.
Plan placement by testing your arm in different positions so you can see how images compress and stretch across the elbow and shoulder. Avoid placing tightly detailed faces or small fine elements directly on the joint where movement will distort them; reserve the elbow for filler elements or larger, simpler shapes. Ask the artist to provide stencils and to check placement in multiple arm positions so the final composition maintains readability whether your arm is extended or bent.
The number of sessions varies with complexity, size, and color choices; a realistic range is several to many sessions scheduled over months. Anchor pieces that require fine shading or heavy color saturation can each take a long session, while filler work and touch ups may be shorter. Talk to your artist about session length preferences and healing windows so you can plan for adequate rest between sittings and know when the sleeve will approach completion.
Ask artists to describe their process for planning a sleeve, to show healed portfolio examples, and to sketch a proposed layout for your arm shape and size. Request details on pigment brands and needle groupings they use because those choices affect line strength and shading. Also ask about realistic timelines, pricing per session, and touch up policies so you leave the consultation with a clear plan for execution and maintenance.
Maintain readability by prioritizing strong outlines, avoiding extremely fine lines in areas that will experience friction, and limiting overly crowded detail. Choose a consistent line weight and a palette with contrasting values so elements remain distinct as the skin changes. Discuss long term care with your artist, plan for periodic touch ups, and select motifs and placements that fit your lifestyle to reduce wear from constant rubbing or sun exposure.
Traditional full sleeve tattoos for guys become clearer choices when you identify a dominant motif, limit your palette, and decide where you want the most visible work. Save a short list of favorite references and note what you like about each one for line work, color, and placement before you visit an artist. Use those notes to get a realistic mock up and to agree on session sequencing so the sleeve grows into a cohesive piece over time.